Connecting to Azure Event Hubs®
In this tutorial
Nussknacker allows creating decision scenarios on real-time data. As one way to ingest your data, you can connect directly to your event broker and Schema Registry to read events from and write to your topics.
In this tutorial, we will explain how to connect to the Azure Event Hubs from the Nussknacker Cloud and use Event Hubs as the input and output from Nussknacker.
Prerequisites
We assume that:
- You have already created the Azure account
- You have created Event Hubs namespace. To do it, you can follow the instruction available at Azure site
- You have enabled at least "Standard" subscription offer option for Event Hubs - it is required to have "Apache Kafka" and "Schema Registry" features enabled. See Azure's pricing option comparison for details
- You have read Apache Kafka and Azure Event Hubs - the most important thing to know is that Azure's "Event Hubs" are similar concepts to Kafka's "Topics"
Authenticating Nussknacker Cloud to access Azure Schema Registry
- Go to Azure portal
- Register application (you can call it e.g. "nussknacker-cloud") in Azure's Active Director. To do that, follow the instruction available on Azure site
- Add a client secret into registered application. To do that, follow the instruction available on Azure site
- Assign Schema Registry Reader role to your application. To do that follow the instruction available on Azure site
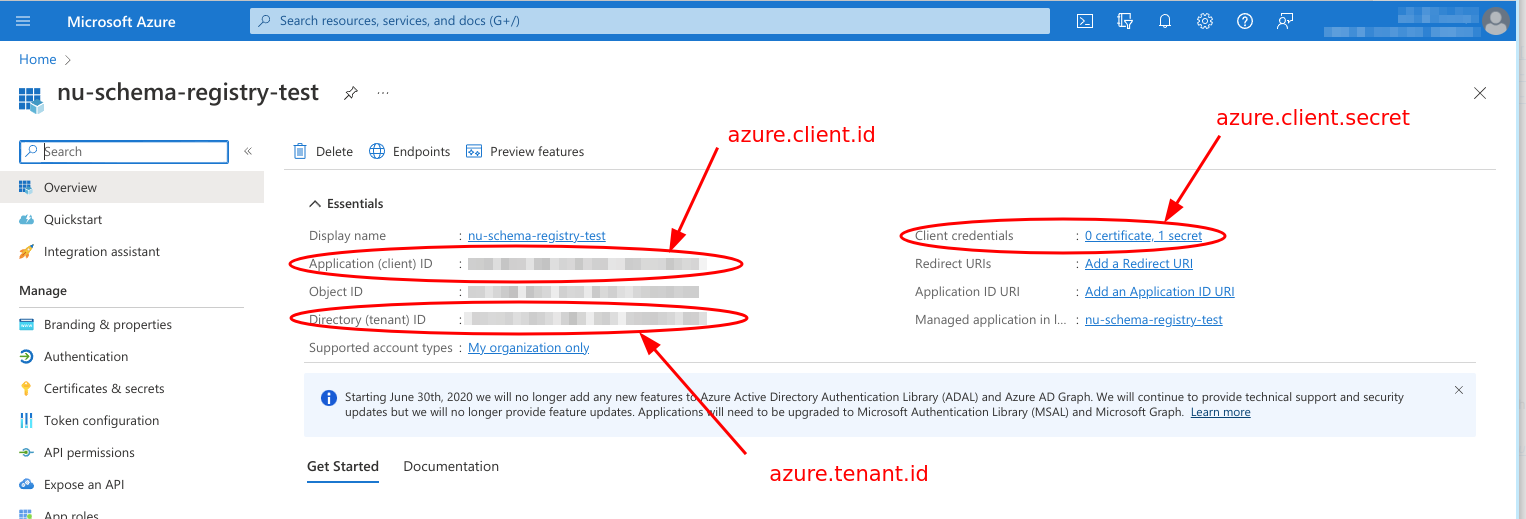
- Copy information from application:
Application (client) ID,Directory (tenant) IDandClient secret value:
Authenticating Nussknacker Cloud to access Azure Event Hubs
- Go to Azure portal
- Navigate to your Event Hubs namespace
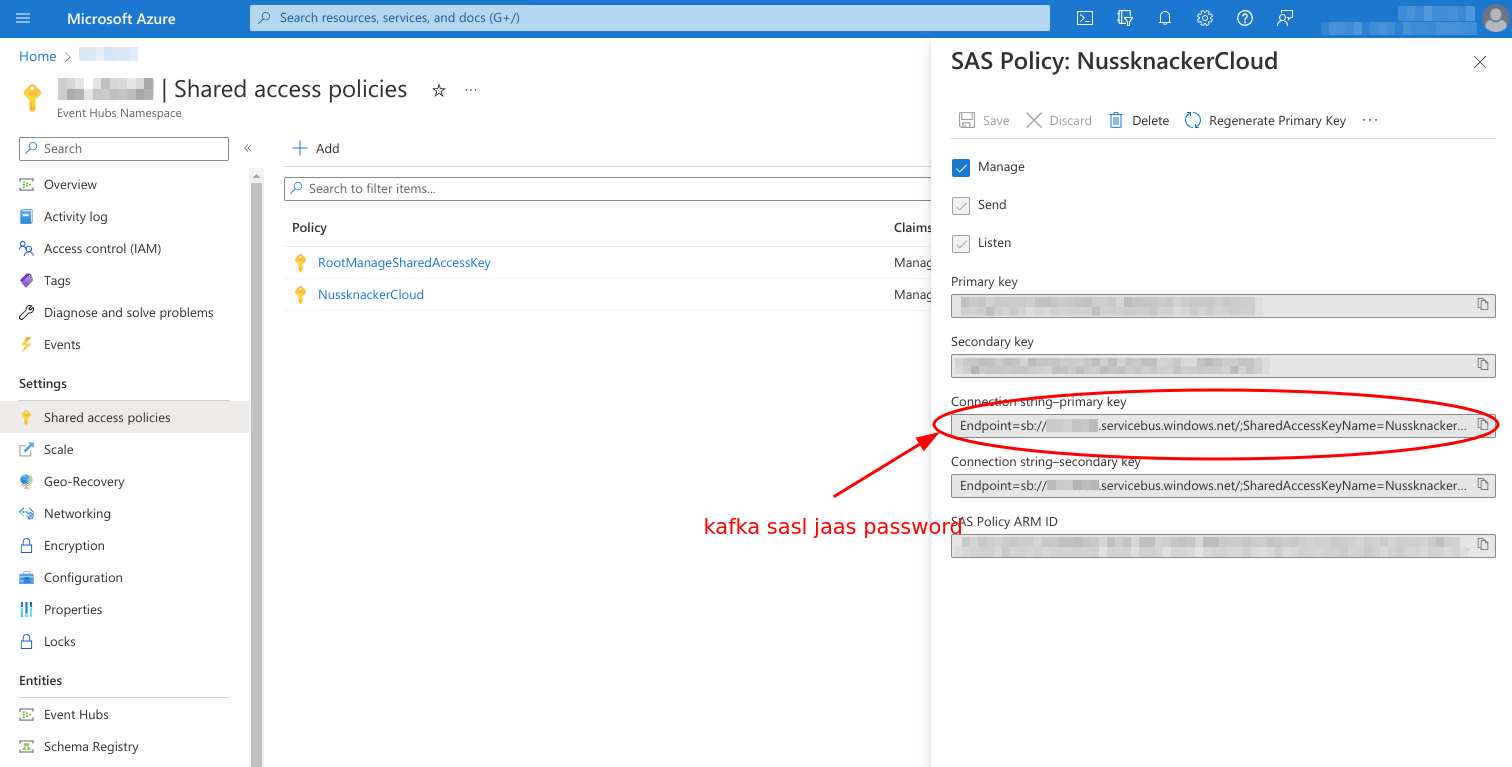
- Create Shared Access Policy rule (you can call it e.g. "NussknackerCloud"). It should have "Send" and "Listen" grant. Optionally add "Manage" grant if you want Nussknacker to create "nussknacker-errors" event hub by itself (this event hub will be used for Exception handling purpose). You can read more about SAS Polices at Azure site.
- Copy the
Connection string–primary key:
Creating Schema group in Azure Schema Registry
- Go to Azure portal
- Navigate to your Event Hubs namespace
- Navigate to your Schema Registry Entity
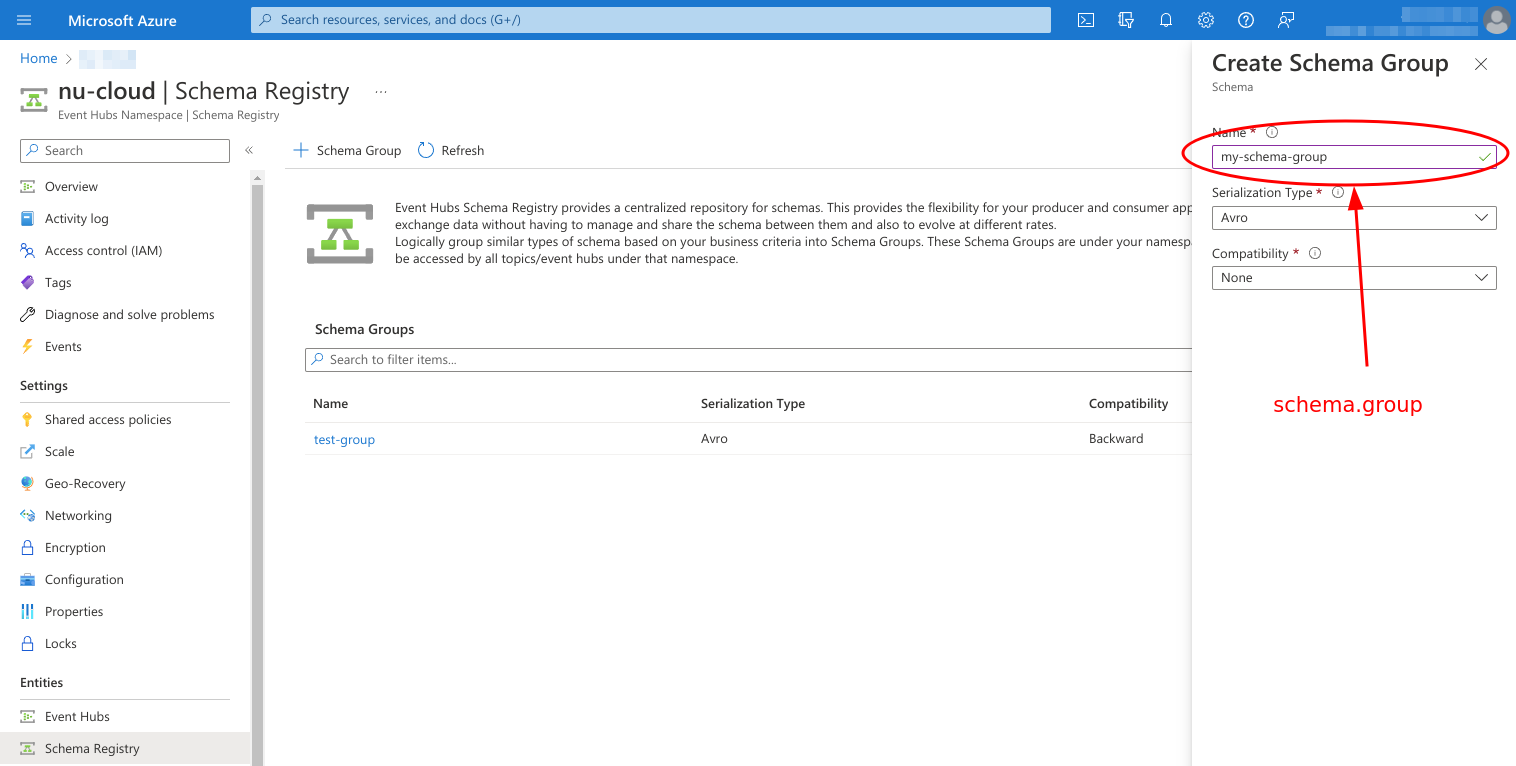
- Click
+ Schema Groupbutton - Fill the form
Nameshould be the name of your group - Nussknacker will have access only to schemas inside this groupSerialization Typeshould beAvro- Nussknacker currently handle only Avro schemas for Azure Event Hubs. But still you can use JSON messages with it. See the instruction below.Compatibilityyou can leave the default value (None) but for production usage it is good to ensure at leastBackwardcompatibility
Setting up Nussknacker Cloud
Go to Nussknacker Cloud
Click
Create instanceon the left panelChoose your instance name or use autogenerated value
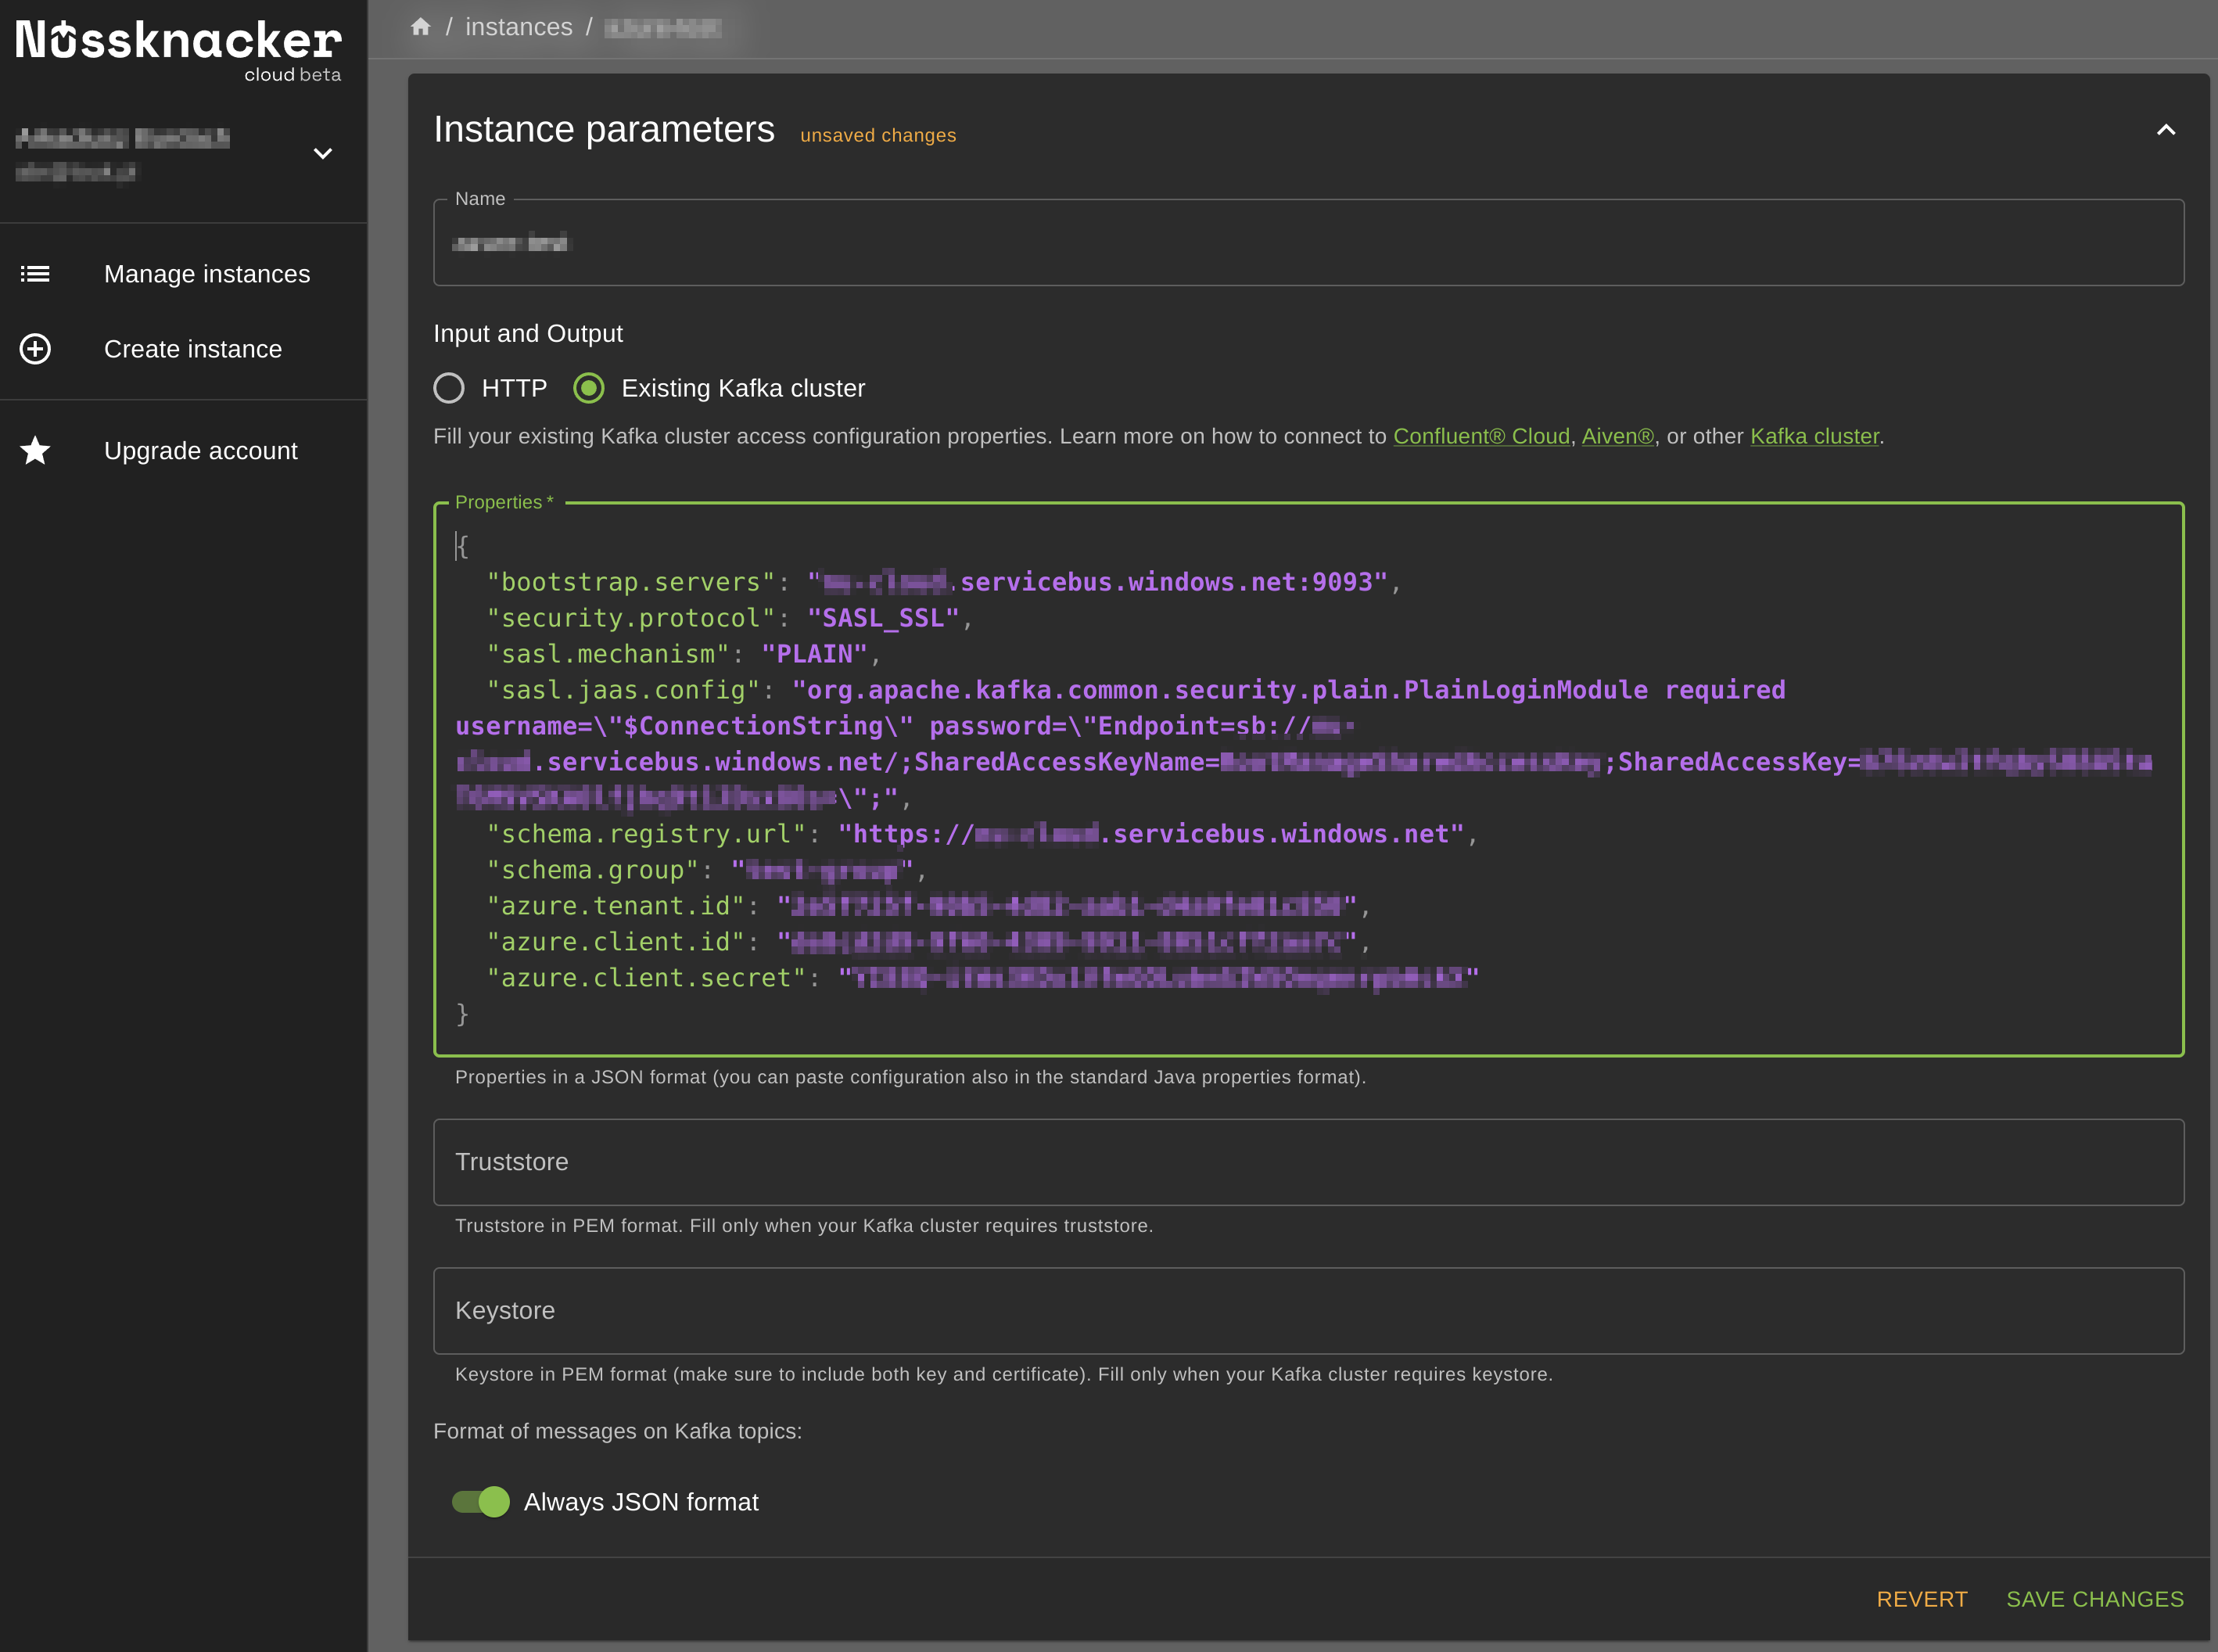
Choose
Existing Kafka clusterFill in the following fields
Properties:
{
    "bootstrap.servers": "xxx.servicebus.windows.net:9093",
    "security.protocol": "SASL_SSL",
    "sasl.mechanism": "PLAIN",
    "sasl.jaas.config": "org.apache.kafka.common.security.plain.PlainLoginModule required username=\"$ConnectionString\" password=\"Endpoint=sb://xxx.servicebus.windows.net/;SharedAccessKeyName=xxx;SharedAccessKey=xxx\";",
    "request.timeout.ms": "60000",

    "schema.registry.url": "https://xxx.servicebus.windows.net",
    "schema.group": "xxx",
    "azure.client.id": "xxxxxxxx-xxxx-xxxx-xxxx-xxxxxxxxxxxx",
    "azure.tenant.id": "xxxxxxxx-xxxx-xxxx-xxxx-xxxxxxxxxxxx",
    "azure.client.secret": "xxx"
}
Where:
bootstrap.serversshould be in formatxxx.servicebus.windows.net:9093wherexxxis your Event Hubs namespacesasl.jaas.configshould be in format as aboveusernameshould be$ConnectionStringpasswordshould be theConnection string–primary keyfrom the SAS Policy created before
schema.registry.urlshould be in formathttps://xxx.servicebus.windows.net:9093wherexxxis your Event Hubs namespaceschema.groupshould be the name of the Schema Group crated beforeazure.client.idshould be the Application (client) ID of the registered Appazure.tenant.idshould be the Directory (tenant) ID copied from the registered App's overviewazure.client.secretshould be the Client secret value copied from the registered App's overview
TruststoreandKeystoreshould be left emptyFormat of messages on Kafka topicsif you use the defaultDepending on schema typeoption, you will be able to communicate with Nussknacker sources/sinks only using binary, Avro format, because JSON schemas for Azure are currently not supported yet. If you want to communicate using JSON, you can switch this option toAlways JSON formatwhich will cause that even for Avro schemas, JSON messages format will be used
Click submit button
Your Nussknacker instance connected to Azure Event Hubs will be created within a couple of minutes
Creating an Event Hub and schema
- Go to Azure portal
- Navigate to your Event Hubs namespace
- Navigate to your Event Hubs Entity
- Click
+ Event Hubbutton - Set a name and optionally additional parameters like Partition count and Retention policy
- Click
Review + create - Click
Create - Navigate to your Schema Registry Entity
- Enter into previously created Schema group
- Click
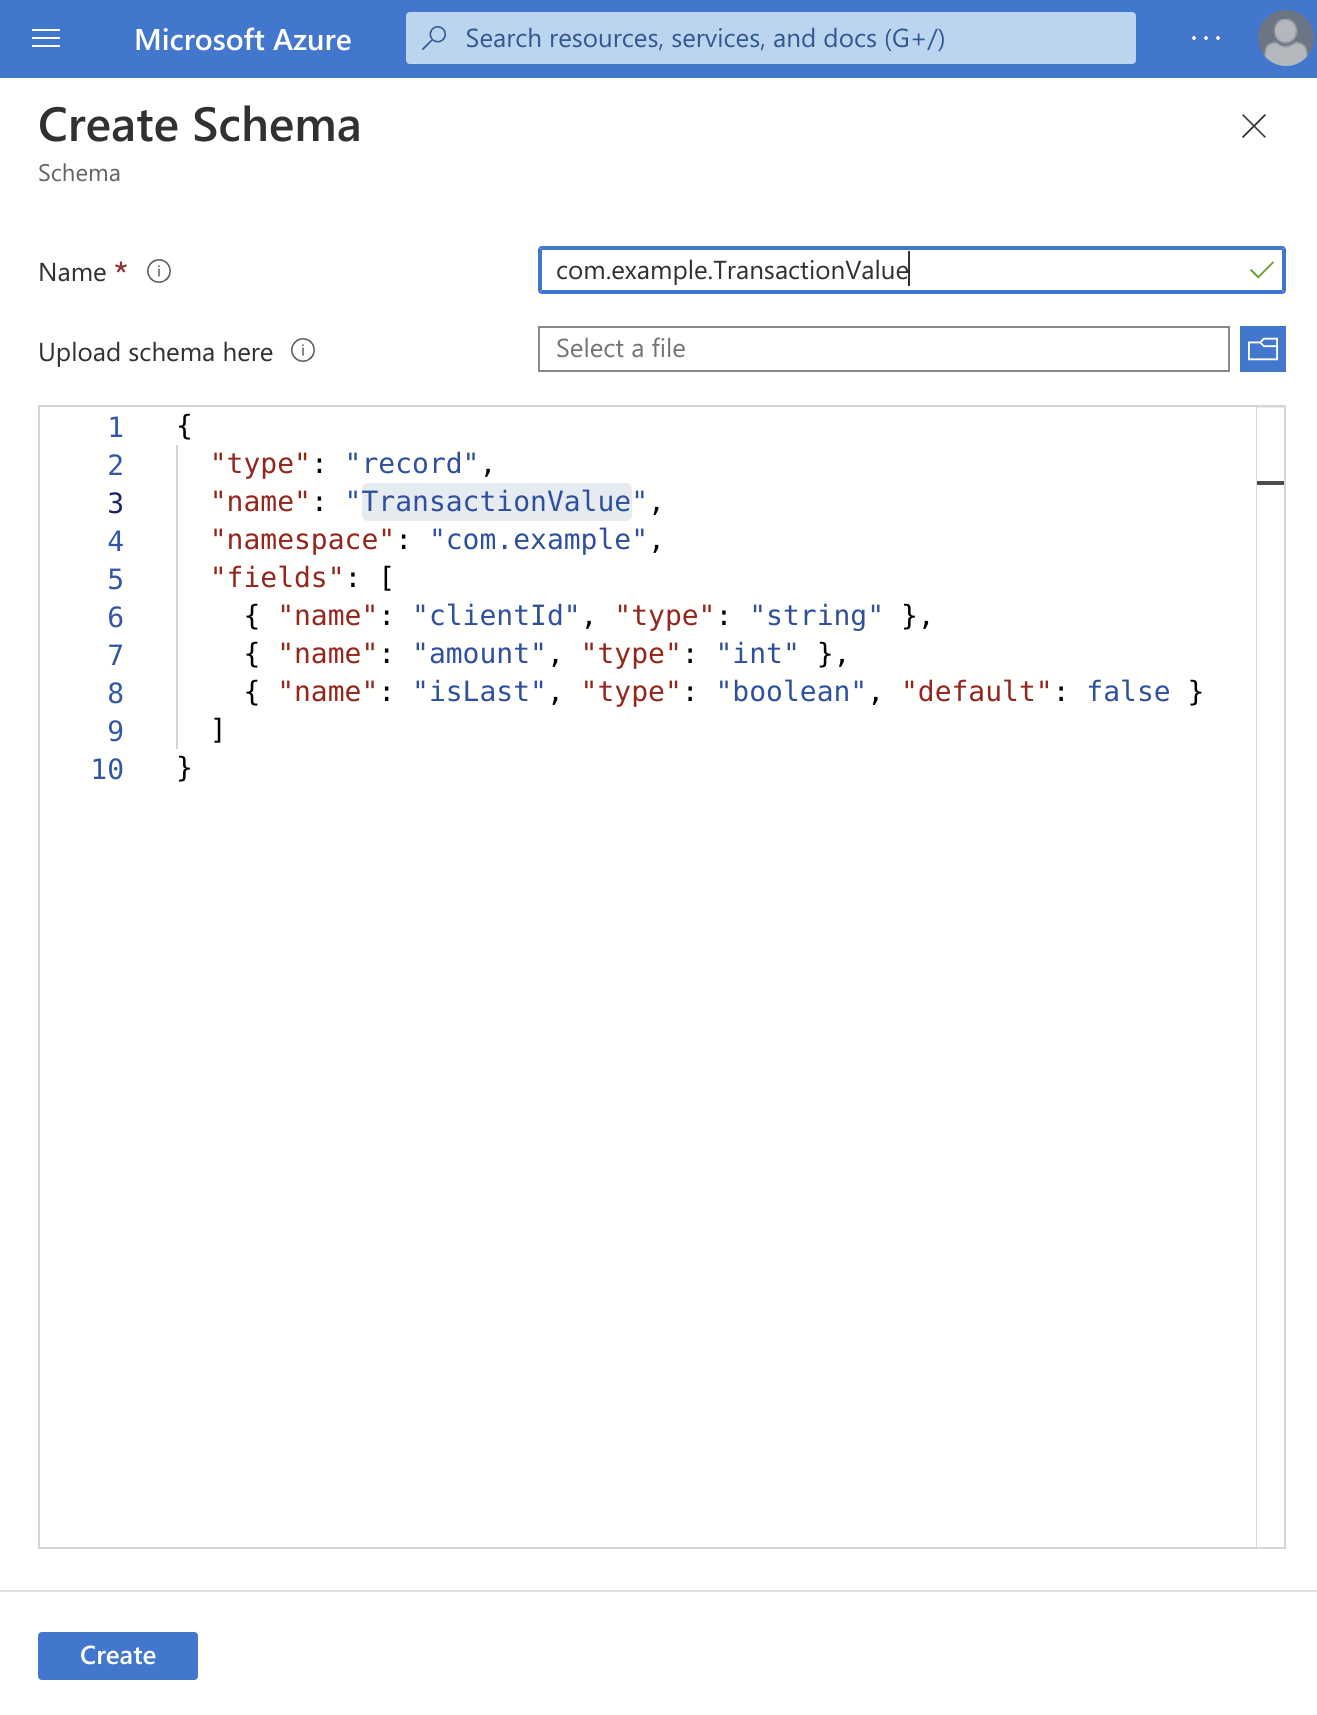
+ Schemabutton - Set a name and a schema content. Remember that the name should be in format
CamelCasedTopicNameValue. Read more about how schemas are associated with even hubs in the documentation

Creating and deploying scenario
- Go to Nussknacker Cloud management
- Open your running Nussknacker instance with the
Open instancebutton - Create your first scenario with the
Create scenariobutton- Choose the preferred scenario name
- Drag and drop the
Kafkasource from the left panel - You should see your topic on the
Topicdrop-down list - Add custom logic like filtering, sending to some other
Kafkasink - Press
deploybutton on the left - Wait a while until scenario will be deployed

Sending messages to and receiving messages from Nussknacker scenario
You can read about messaging with Nussknacker in the documentation.
One of the easiest options is to use kafka-console-consumer.sh and kafka-console-producer.sh scripts. Remember that this method will
work with plain text communication which will be possible after switching Format of messages on Kafka topics into Always JSON format
in instance parameters.
To communicate using Avro binary format, check the Azure Schema Registry sample