Nussknacker is a versatile tool that can be used in any industry. For its use to be convenient and effective at the same time, it should be adapted to the domain though. In this post, I will try to introduce several ways to achieve this.

Identify between production and test
When building enterprise systems, you most likely have to maintain multiple environments (production, pre-production, staging, test etc.). To easily distinguish between those deployments you can give them separate domains. Sometimes it may be not enough though, and consequences of deploying a scenario on production instead of test can be devastating. To make users more aware of which environment they use, Nussknacker allows also configuring a nice label with dedicated color on the top bar.
![]()
environmentAlert {
content: "DEVELOPMENT ENVIRONMENT",
cssClass: "indicator-green"
}
Improve audits by validating comments
Nussknacker scenarios often implement crucial business processes in a company, so every action, like creating a new version of the scenario, or deploying or canceling it, must be audited. Those actions can be annotated with a comment in Nussknacker but even then, it’s hard to track changes, especially across other systems (usually we use at least Jira, or other issues tracker). By default, comments are not required, their content can be arbitrary, and ideally we would like to enforce that every action is coupled to an issue in Jira.
Nussknacker offers a mechanism to validate them against a regular expression. This way, one can configure a pattern that forces users to provide issues id from the issue tracker which is used at the company. For some of our clients, this auditability level allowed them to drop the usual cumbersome and ineffective maker-checker pattern.
deploymentCommentSettings: { validationPattern: "(issues/[0-9]*)"
exampleComment: "issues/1234"
}
As you can see it is possible also to provide an example that might be helpful when a user passes an invalid value. 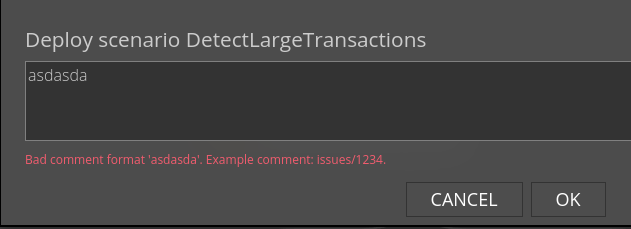
To improve UX one can also configure displaying those issue ids as hyperlinks in the comments section:
using the following configuration:
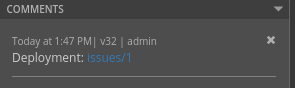
commentSettings: { substitutionPattern: "(issues/[0-9]*)"
substitutionLink: "https://github.com/TouK/nussknacker/$1"
}
Configure components to boost ease of use
In the above example, we see that scenarioType configuration consists of two parts, deploymentConfig and modelConfig. The first one is used for defining technical details of your runtime environment - e.g. connections to Flink or Kubernetes. In modelConfig, on the other hand, we configure component providers.
There are a couple of mutual configuration fields for all types of component providers:
- providerType - determines which type of component provider we are configuring
- componentPrefix - when set, every component name will be prefixed with it. Useful when configuring multiple componentProviders of the same type (e.g. OpenApi enrichers based on the same definition, but pointing to different environments)
- categories - since scenarioType can be reused in multiple categories, here one can determine in which categories components should be available. If empty they will be available in all categories.
Filter OpenApi enrichers for desired responses
name1: { providerType: openAPI
url = "http://myservice.com/swagger"
security: {}
namePattern: "customer.*"
allowedMethods: ["GET", "POST"]
codesToInterpretAsEmpty: [404]
}
Configuration of OpenApi enrichers consists of basic data like url of swagger definition, and optional security configuration.
A single OpenApi definition can describe plenty of operations at the same time, but it doesn’t mean we want to integrate Nusskacker with all of them. Some can be irrelevant to our domain or should be unavailable for Nusskacker for other reasons. In the namePattern configuration field, we can provide a regular expression that filters out unwanted operations. Filtering is done also by the http method. By default only GET operations are available, but they can be changed using allowedMethods.
By default, invocation of OpenApi enricher is considered as successful if it responds with a 2xx HTTP status code. From the business perspective, it’s not always enough - we might consider the absence of resources also as a successful response. Using codesToInterpretAsEmpty Nussknacker can be told which HTTP status codes consider successful but empty responses.
Customise components to optimise user's work
Nussknacker has a really friendly UI, but sometimes even the most experienced domain expert may forget the name of some parameter or simply make a typo.
In order to limit this, parameters of components in Nussknacker can be pampered with default values and additional validation arising from your domain. Also, special editors can be provided (e.g. with a select box with a hard-coded list of values, instead of a text field). Links to external resources can be attached to each component/fragment as well. Not only it makes users feel that the tool is tailored to their business but also optimizes their work.

The above component is customized with the following configuration:
modelConfig {
componentsUiConfig {
my-component-1 {
docsUrl: "https://link.to.docs"
params {
a {
validators: [
{
type: "RegExpParameterValidator"
pattern: "customerId-[0-9]*"
message: "has to match customer id format"
description: "really has to match..."
}
]
}
b {
editor: {
type: "FixedValuesParameterEditor",
possibleValues: [
{"label": "one", "expression": "'1'"},
{"label": "two", "expression": "'2'"}
]
}
}
c {
defaultValue: "'defaultValue'"
}
}
}
}
Additional properties
Nussknacker scenarios can implement different use cases and those sometimes have to be parametrized - regardless of data they process. E.g. in the marketing domain, where each scenario realizes one campaign it could be the id of this campaign.
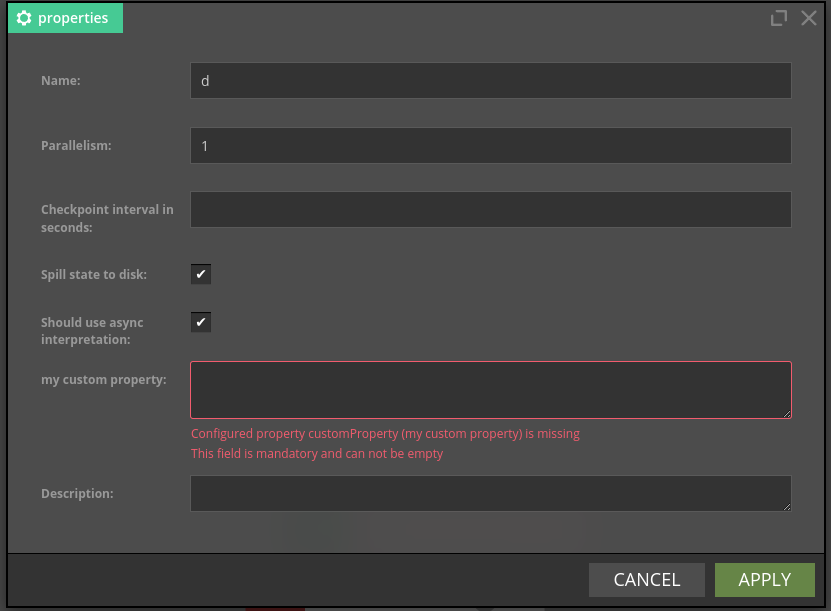
The Properties button in Nussknacker opens a modal with a form where the user sets the required (or not) information for each scenario. It can be common settings like name or description or specific to processing type and engine (e.g. schema in RequestResponse or parallelism in streaming). These are “technical” settings, but it is possible to configure others, which are specific to the domain.
modelConfig {
additionalPropertiesConfig {
customProperty {
label: "my custom property"
editor: {
type: "TextareaParameterEditor"
}
validators: [
{
type: "MandatoryParameterValidator"
}
]
}
}
As you can see, those properties can have editors and validators configured the same way as the component’s parameters.
Then, the value of those properties can be accessed via variable #meta.properties in any SPeL expression in the scenario.
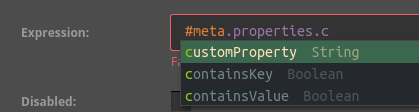
Notice, that variable is accessed by its name, and in the Properties form is displayed by its label, as we configured it. By default, the label is equal to the name though.
Additional tabs
When building an ecosystem from multiple components, its users often complain that they have to jump between applications, and would rather have all of them in the same place.
Since Nusskancker is often only part of such an ecosystem it’s extremely convenient to access other applications via Nusskancker’s tabs, which fortunately are configurable.
You can arbitrarily set their order, limit their visibility depending on the user’s permissions, as well as add new ones.
We usually add 2 types of tabs:
- Url - Tab is just a hyperlink
- Iframe - tab’s link is opened in a nested iframe in Nussknacker
Example configuration may look like this:
tabs = ${tabs} [ { title: "Kafka management", url: "https://example.akhq.com/", id: "akhq", type: "IFrame" },
{ title: "Logs", url: "https://example.kibana.com/", id: "kibana", type: "IFrame" },
{ title: "Internal documentation", url: "https://example.confluence.com/", id: "confluent", type: "Link" },
]
${tabs} in the beginning is a reference to tabs configured by default - so in this way, we append 3 custom tabs.
Multiple categories and processing modes
Nusknacker is widely used in various fields. Often, it may serve many purposes in a single company - e.g. IoT and real-time marketing. But it doesn’t mean that one has to deploy multiple instances to achieve that. It would not necessarily be convenient. Instead, considering the fact that Nussknacker provides excellent UI and Runtime separation, it is possible to configure many categories in the same Nussknacker deployment.
Each category has a separate configuration - which means that it can realize different processing modes, communicate with different external services, have separate permissions etc.
categoriesConfig: {
"real-time-marketing": "streaming"
"iot": "streaming"
"next-best-action": "request-response"
}
scenarioTypes {
"streaming": {
deploymentConfig: ${flinkDeploymentConfig}
modelConfig: {
components: {
name1: { … }
name2: { … }
}
}
}
"request-response": {
deploymentConfig: ${k8DeploymentConfig}
modelConfig: {...}
}
}
Reducing deployment time
Nussknacker is a low-code tool that is also highly extensible. There are plenty of APIs, which allow the implementation of custom components, custom runtime engine managers that deploy scenarios executables, or even another expression language.
All of these would normally require coding and then running the software with an additional package attached.
However, Nussknacker is highly configurable and a lot can be adjusted using only configuration, without the need to hire a whole team of highly paid Scala or Java engineers.