In today's rapidly evolving technology landscape, seamless integration and robust authentication mechanisms are paramount to building efficient and secure software solutions. One point of authentication in modern companies is fundamental to reducing complexity.
Nussknacker supports a wide array of authentication methods, including BasicAuth, OAuth2, and OIDC, allowing developers to harness the power of different authentication mechanisms tailored to their needs.
In this blog post, I'm going to describe step by step the integration with Microsoft Azure Active Directory (AAD) based on recent work for one of our esteemed customers, showcasing the real-world impact and how easy it can be :)
Let’s go through the steps!
Introduction
Azure AD is a cloud-based identity and access management service provided by Microsoft. It serves as a central hub for managing user identities, controlling access to applications and resources, and ensuring secure collaboration across multiple platforms. Azure AD enables single sign-on, multi-factor authentication, and identity protection, making it essential for modern organizations to streamline authentication processes, enhance security, and provide seamless integration with both Microsoft and third-party applications.
In this example, we are going to use the OIDC authentication method which is based on OAuth2 standards. More information can be found at the official MS AAD OIDC and Nussknacker Docs.
MS Azure Configuration
To get started, you will need to sign in to your Azure account at https://portal.azure.com/. I'm assuming that your organization has an account and has given you the proper permissions to manage it. If you are just doing this for your own testing, you can use free/demo access and just sign in to MS Azure Panel.
Registering an application
After you have signed in to the portal, you will need to register the application in AAD. You can do this by going to Azure Active Directory → App registrations → New registration.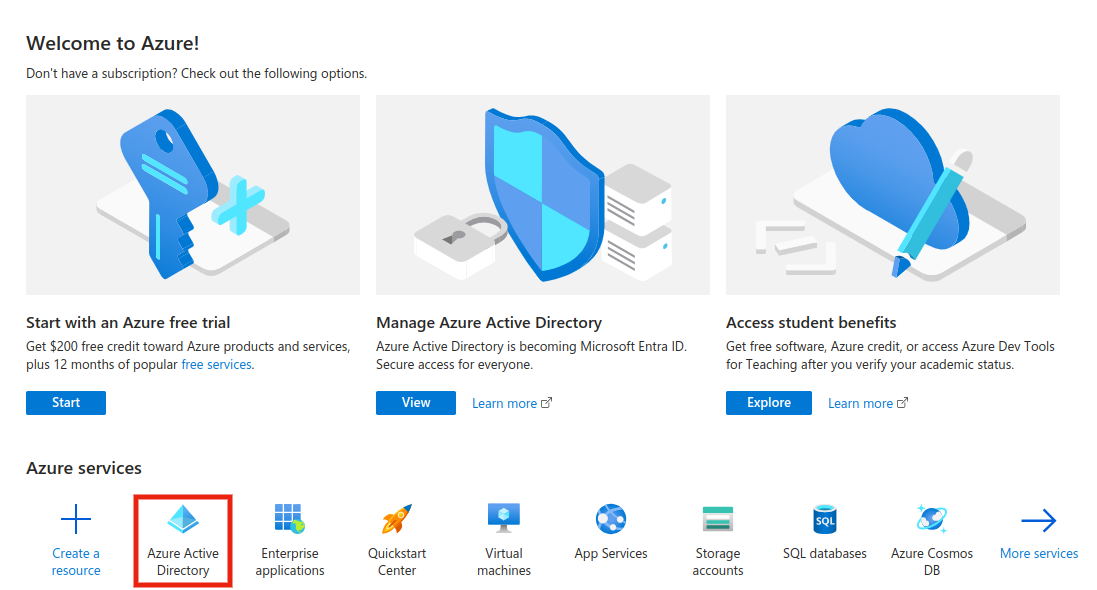
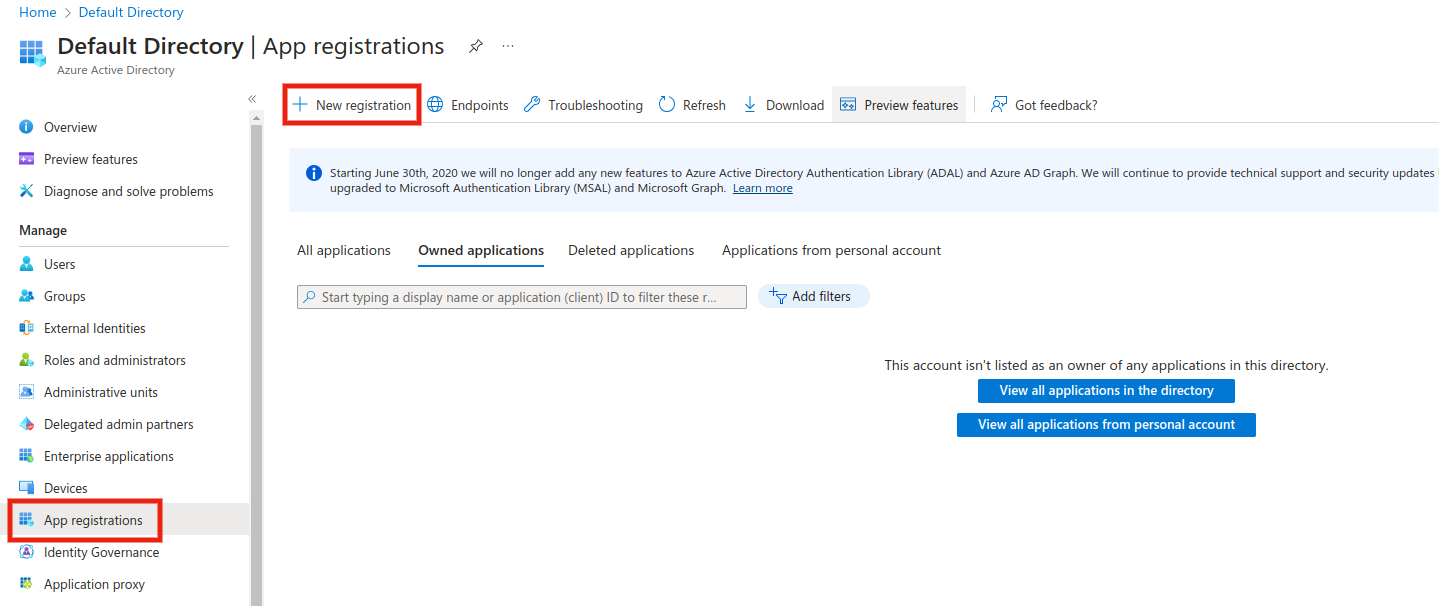
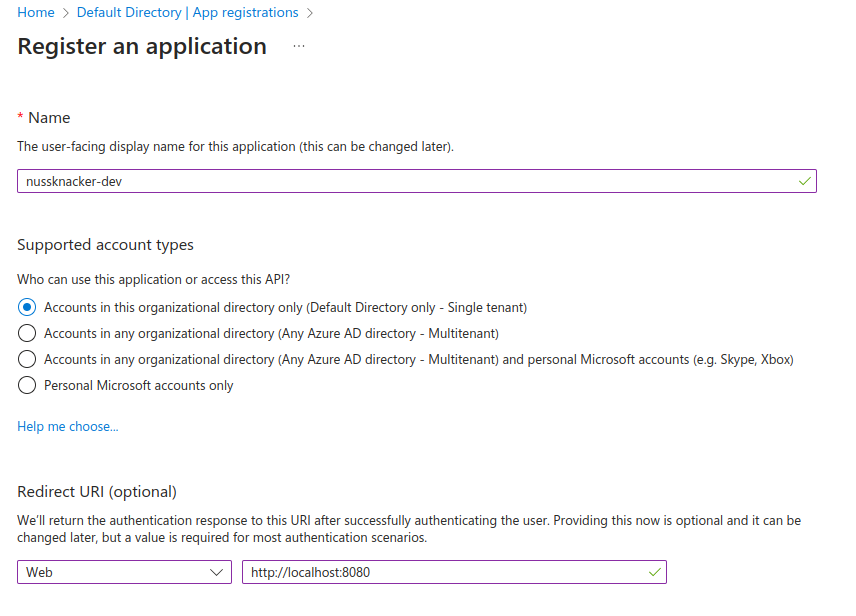
When you are in the right place, click the "New registration" button. Fill in the following fields:
- Name: your application name, e.g. nussknacker-dev
- Supported account types: access to the application, here the first option is enough if you only want to allow your users to access
- Redirect URI: this is a www address where the user will be redirected after a proper authentication process. It should be your Nussknacker application address, which is accessible to users – e.g. a reverse proxy address if Nussknacker is behind it. In our example, we’ll provide a local test address, e.g. web → http://localhost:8080
 Once you have successfully registered your new application, you will be redirected to an overview page where you will find information such as tenant ID, application ID, etc. This information will be used in the next step.
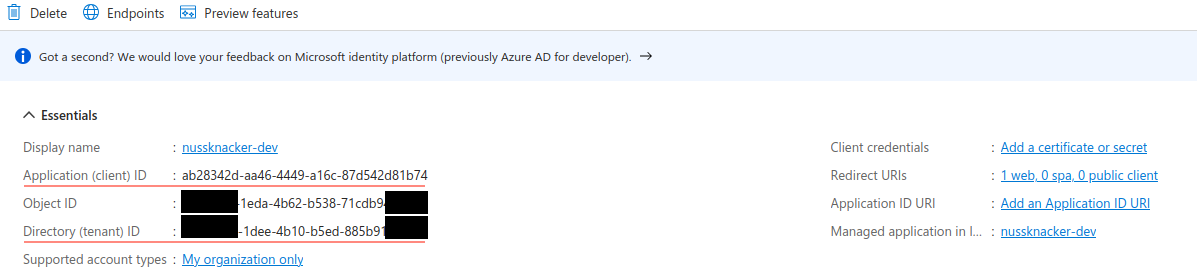
Here you can also find additional information by clicking on the Endpoints button or entering the following URL: https://login.microsoftonline.com/YOUR_TENANT_ID/v2.0/.well-known/openid-configuration.
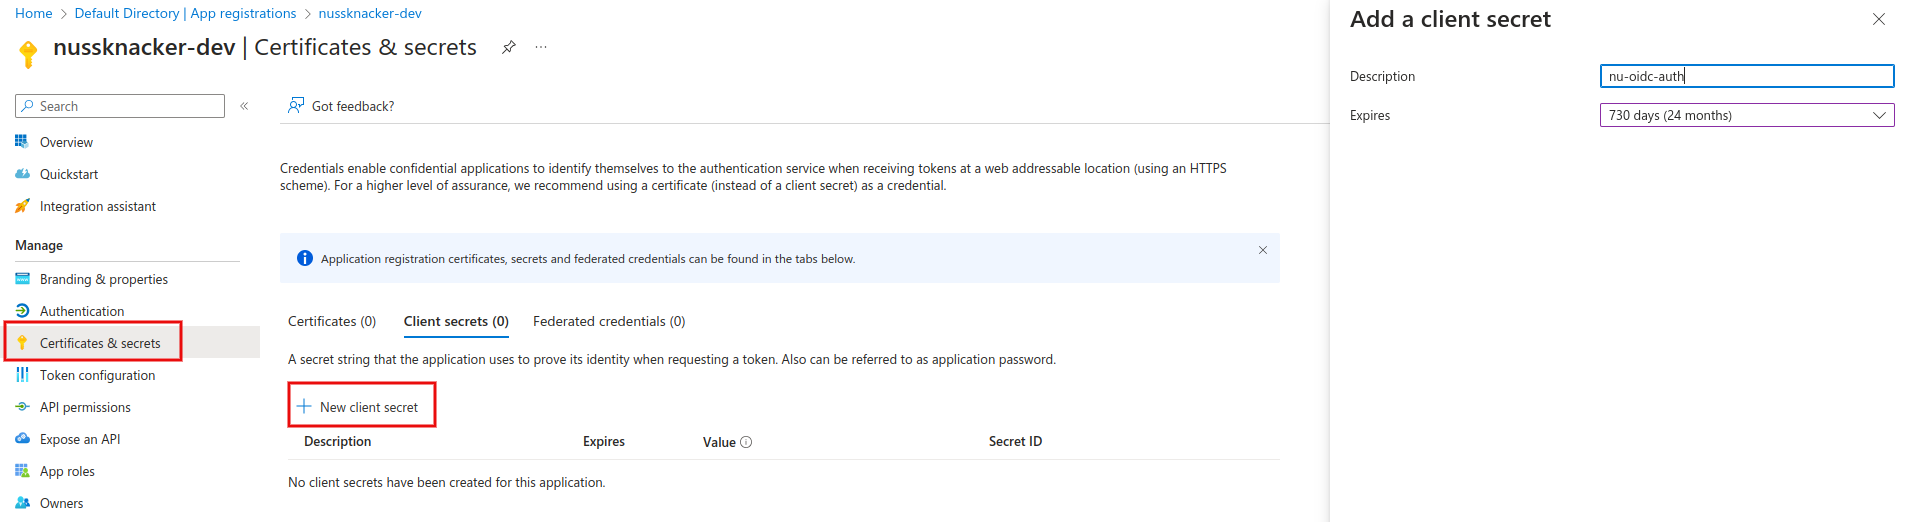
Creating a secret key
Let's generate a secret key for our newly created application at Azure Active Directory → App registrations → Your APP → Certificates & secrets → New client secret. On the right side of the screen, you will need to enter a description for the key – e.g. nu-oidc-auth – and select the key expiration time, which typically depends on your organization's policy.
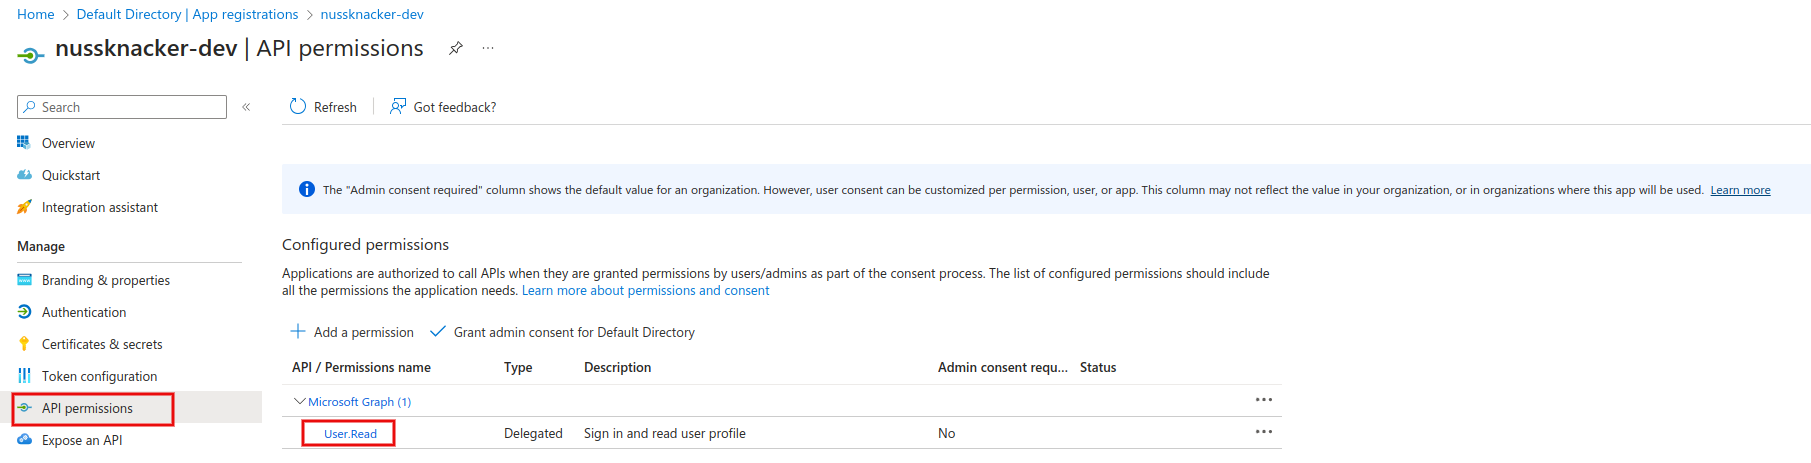
API permissions
Nussknacker uses the AAD user profile API to elegantly present information about the user. Therefore we need to add proper permissions to our application. We can do this at Azure Active Directory → App registrations → Your APP → API permissions.
The minimum API permission is User.Read, which allows us to read the necessary information about the user.
Managing roles
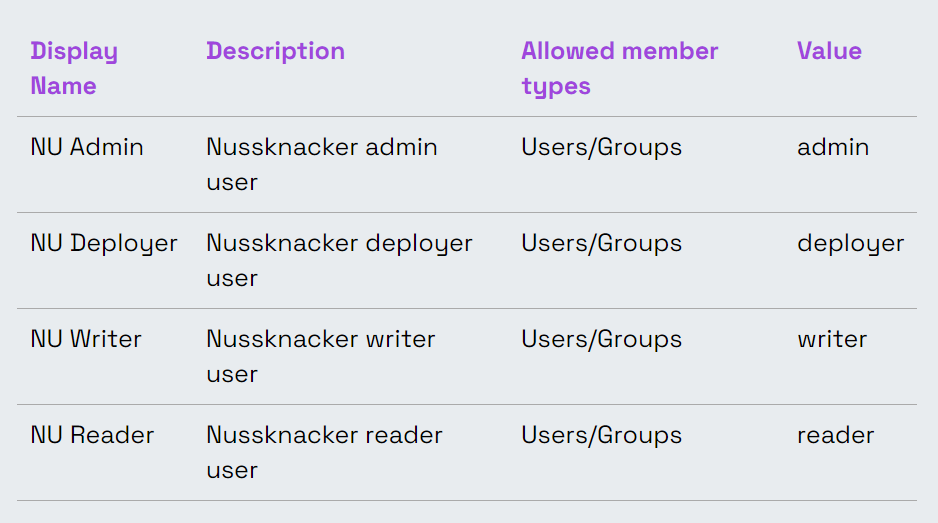
The next step is to prepare the app’s roles. These will be the equivalent of the roles set in NU (which will be described in the next chapter). You can do this at Azure Active Directory → App registrations → Your APP → App roles → Create app role.
On the right side of the screen, you will find four fields to fill in:
- Display name: this is the information displayed during the management of the role in Azure Portal
- Allowed member types: the specification to whom this role can be assigned – we will use Users/Groups
- Value: this is the name of the role that will be returned to Nussknacker – it's equivalent to the NU role name
- Description: this is just your own description of this role

For our example, we will prepare four sets of roles:
Managing permissions
The last thing that we need to configure in the Azure Portal is to assign previously created roles to the user. This part is available at
Enterprise applications → Your APP → Users and groups → Add user/group. In this example, we’re going to give our user admin permission.
Here, you can also edit user properties, e.g. Display name, which will be used by Nussknacker to display information about the user, e.g. on the deployment history.
Nussknacker configuration
Finally, once we've finished the configuration AAD, we can move to configure our Nussknacker APP. The first thing we need to change is to set the authentication section in the application.conf:
authentication: {
method: "Oidc"
issuer: "https://login.microsoftonline.com/d5ddda04-36ab-11ee-be56-0242ac120002/v2.0"
clientId: "ab28342d-aa46-4449-a16c-87d542d81b74"
clientSecret: "Wbv8Q~oSVizh3~vwr4rw7K54n5TE85nAzd2~CbH9"
rolesClaims: ["roles"]
usernameClaim: "name"
usersFile: "conf/users.conf"
}
where:
- issuer: https://login.microsoftonline.com/YOUR_TENANT_ID/v2.0
- clientId: the value of Azure Active Directory → App registrations → Your App → Certificates & secrets → Your created secret value
- clientSecret: the value of Azure Active Directory → App registrations → Your App → Overview → Application (client) ID
- rolesClaims: the list of claims in JSON / JWT where information about the user's roles is stored. In the Azure AD case, roles are stored in the `roles` claim
- usernameClaim: claim field in JSON / JWT where information about the user's username is stored. This information is displayed in Nussknacker GUI e.g. on the deployment history. In the Azure AD case, information from the Display name user property is stored in the name claim
- usersFile: path to the file where role definitions are stored
More information about how to configure the authentication method can be found in our OpenId connect documentation.
Nussknacker user rules configuration
To complete the configuration, we need to set the 'rules' configuration key, which contains the definition of the roles. These rules are stored in the users.conf file. Here is an example configuration that can be used:
rules: [
{
role: "admin"
isAdmin: true
},
{
role: "deployer"
permissions: ["Read", "Write", "Deploy"]
globalPermissions: ["AdminTab"]
categories: ["Default", "RequestResponse", "Category1", "Category2"]
},
{
role: "writer"
permissions: ["Read", "Write"]
categories: ["Default", "RequestResponse", "Category1", "Category2"]
},
{
role: "reader"
permissions: ["Read"]
categories: ["Default", "RequestResponse", "Category1", "Category2"]
}
]
where:
- role: corresponds to a Value param from AAD User Role. The role param from Nussknacker should be the same as the Value param from AAD
- permissions: describes privileges, more information can be found in the docs
- categories: related to permissions, a list of categories the user has access to
- isAdmin: special admin permissions, we don't need to specify categories, admin has access to everything
- globalPermissions: list of special privileges like access to some tabs, etc.
Note that we can create multiple rules per category using this rule format:
rules: [
{
role: "default_deployer"
permissions: ["Deploy"]
categories: ["Default"]
},
{
role: "default_writer"
permissions: ["Write"]
categories: ["Default"]
},
{
role: "category1_deployer"
permissions: ["Deploy"]
categories: ["Category1"]
},
{
role: "category1_writer"
permissions: ["Write"]
categories: ["Category1"]
}
]
In that case, you have to create multiple roles in your AAD and assign proper roles to the user.
Voila! That's the whole integration. Now Nussknacker will redirect you to the MS sign-in page, and after a successful sign-in, we'll be redirected to our Nussknacker app with the necessary permissions.
An example configuration can be found in our official quickstart repository on GitHub.
More to come, stay tuned guys!