Setting Up MQTT Integration in Nussknacker Cloud for Real-Time IoT Data Processing
MQTT is a widely used networking protocol for transmitting sensor data in IoT applications. We recently added the ability to integrate with this protocol in Nussknacker Cloud, making it easier to process IoT data in real-time. In this blog post, we will show you how to create and use such an integration.
MQTT Basics
The protocol is based on a publish-subscribe architecture.
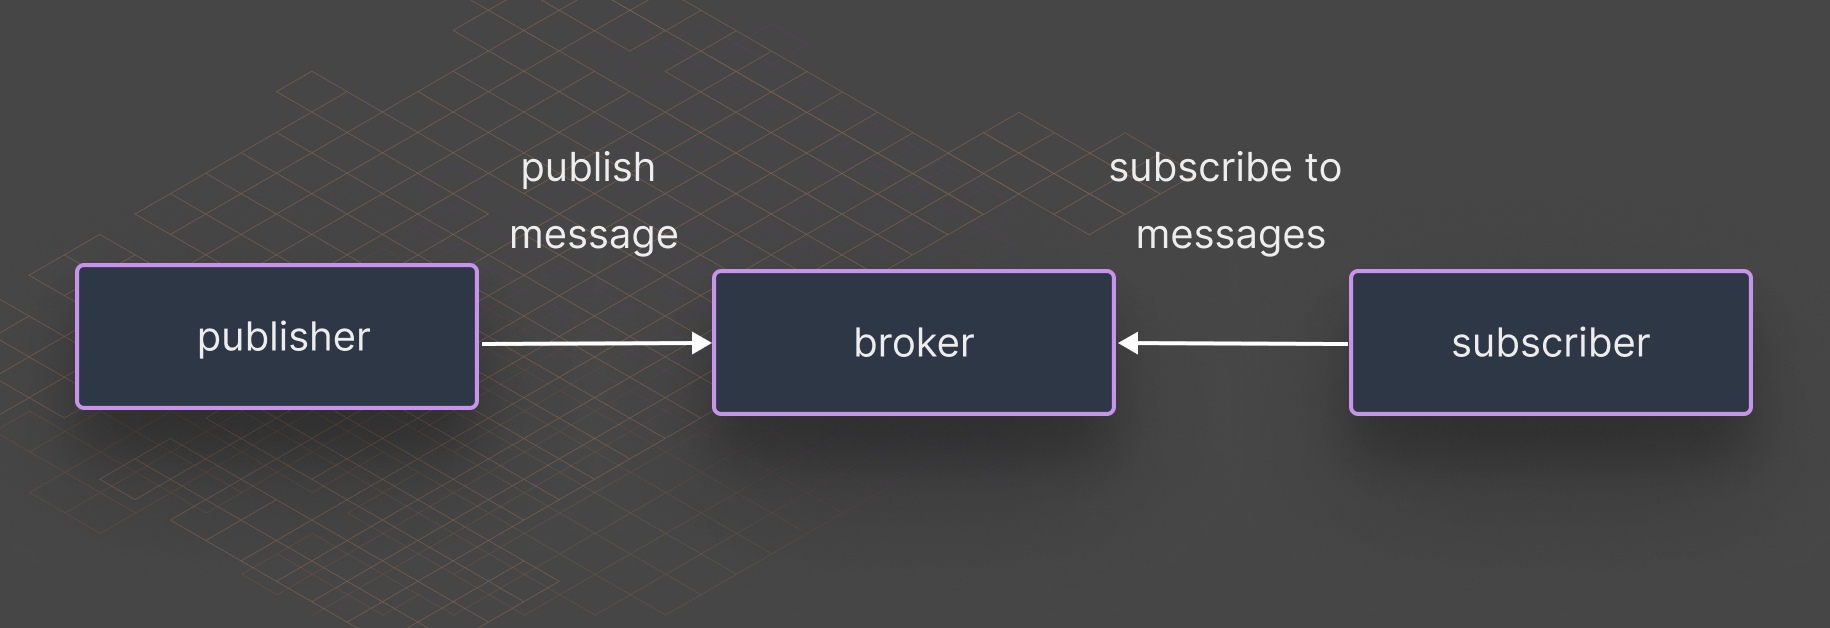
To use the protocol, you need an MQTT broker. This is a server to which all other devices in the IoT network connect. Connected devices can publish messages (which are bytes with no format requirements) to a topic on the broker. Topics are simply tags by which messages are organized. Devices can also subscribe to any topic so that the broker notifies them when a message arrives at that topic.
Setting Up MQTT Integration: A Step-by-Step Guide
In a previous blog, we explored a Nussknacker scenario that compared the SQL-based approach using the RisingWave streaming database to Nussknacker’s low-code approach. The Nussknacker scenario processes sensor readouts, such as temperature and power consumption, to detect abnormal machine operating conditions. The scenario reads these readouts using the MQTT protocol. To make this possible, it’s necessary to create an MQTT integration in Nussknacker that contains all the configuration choices necessary to connect to an MQTT broker and prepare/interpret MQTT messages. Let’s examine how you can create such a Nussknacker integration in your Nussknacker Cloud account.
MQTT Broker Creation
First, you will need an MQTT broker. There are some public brokers, to which anyone can publish and read messages, but they are not always reliable. There are also many sites where you can create your own broker. It's also possible to host your own MQTT broker. Ultimately, any broker can work with Nussknacker. For this example, you can use a free MQTT broker created on the HiveMQ website.
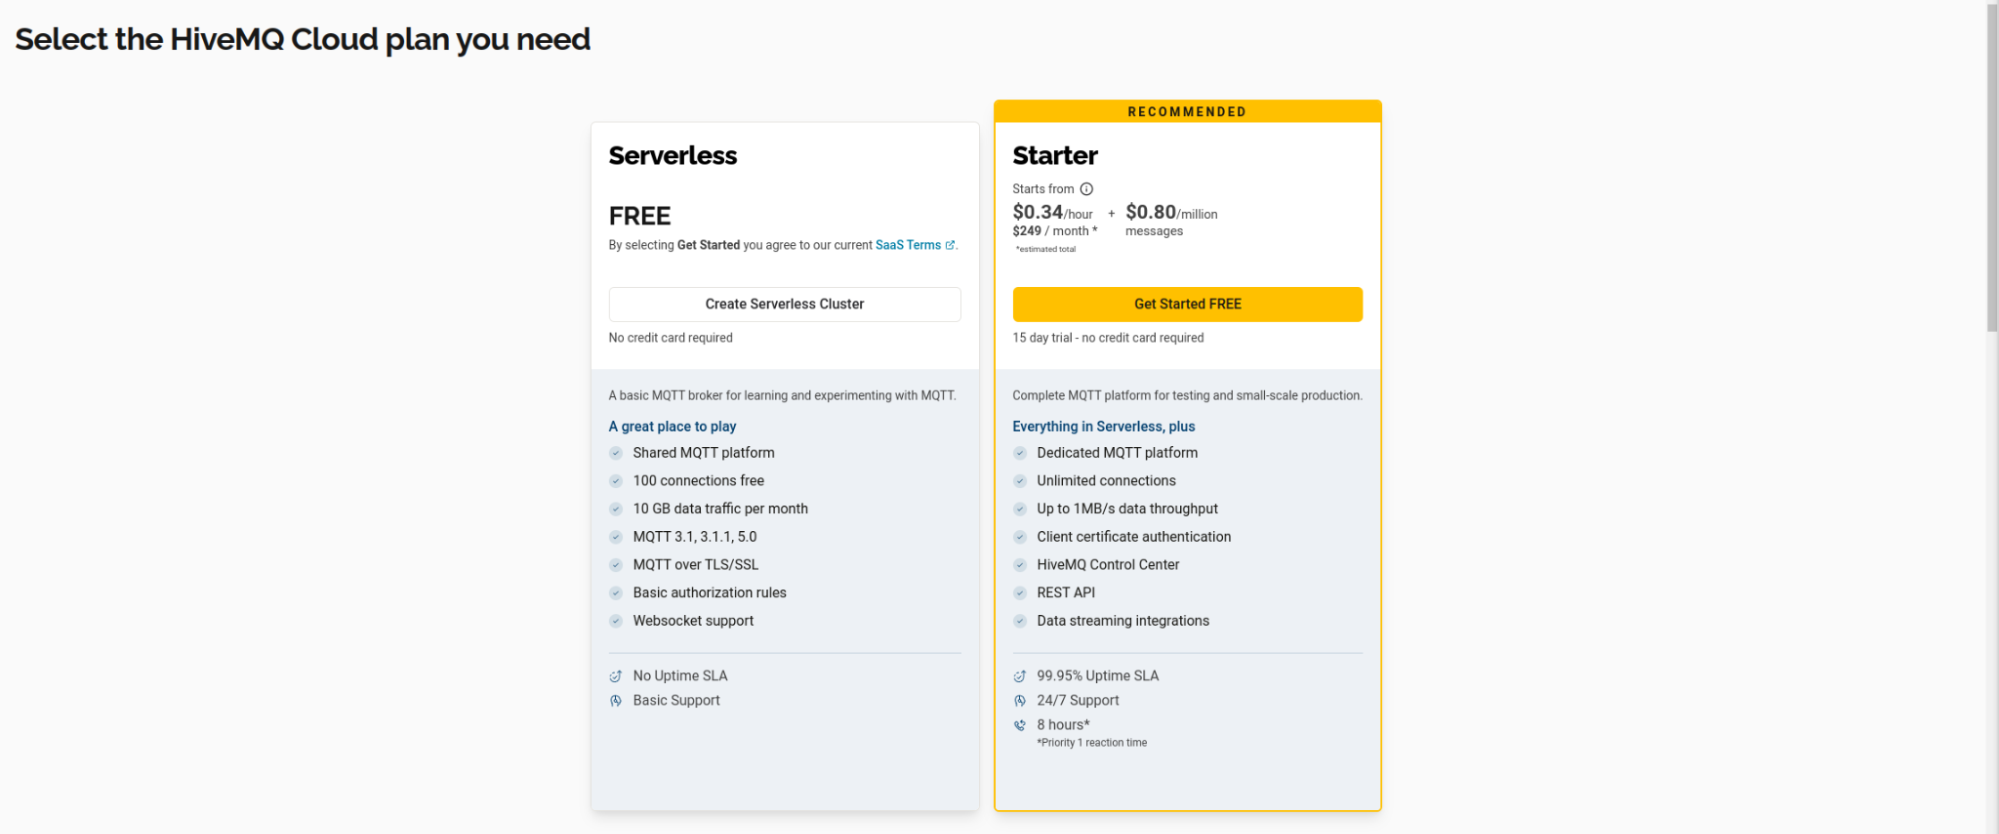
To create it, go to the HiveMQ website and select "HiveMQ Cloud". After logging in, select the free option "Create serverless cluster".
Navigate to the cluster you created and open the “Getting Started” tab, which will bring you to this screen.
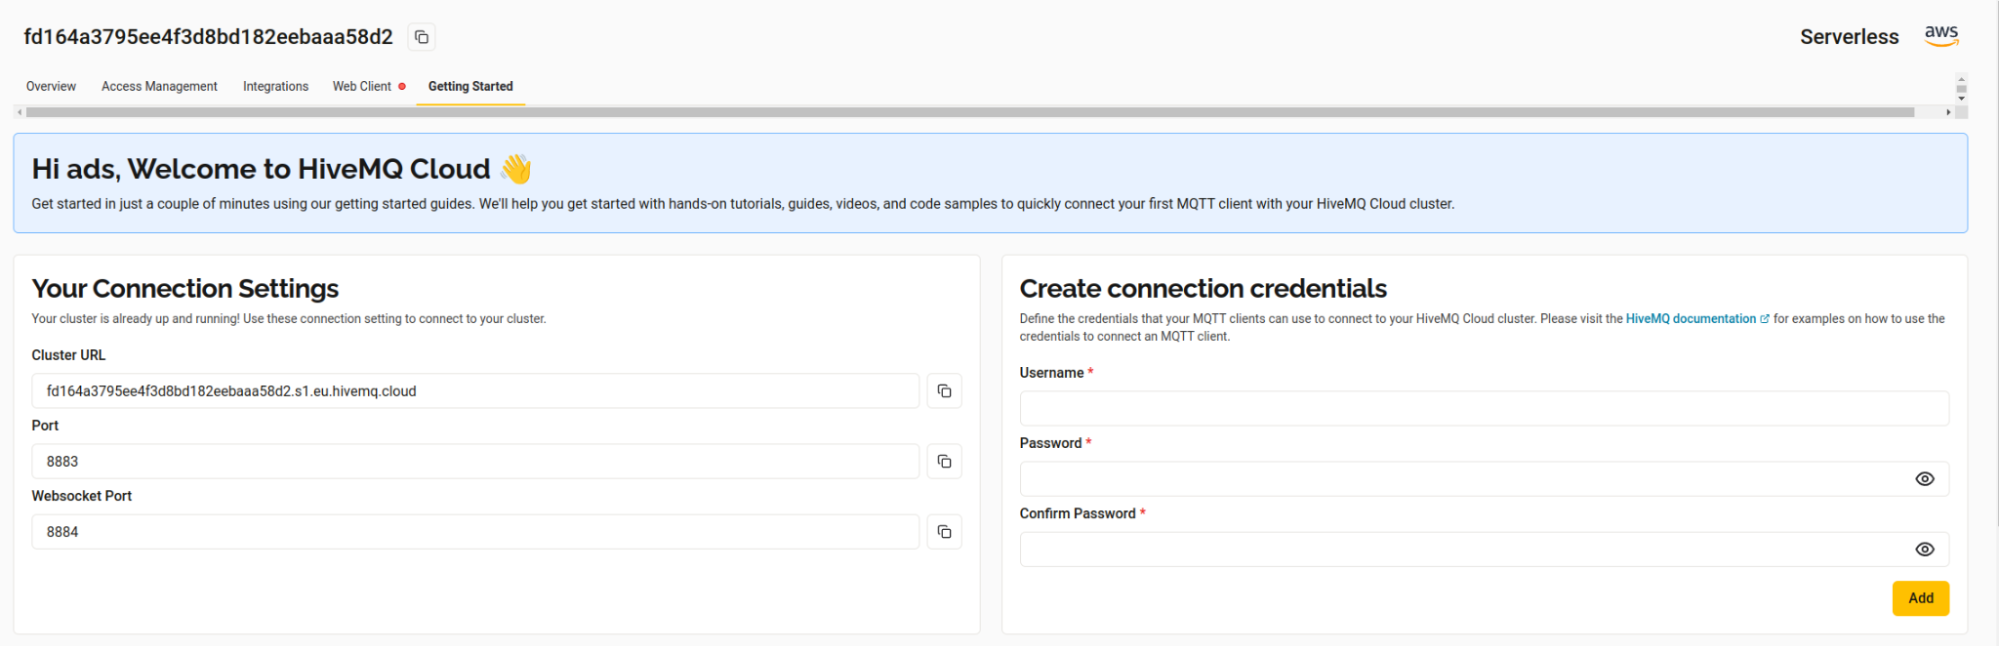
Here you need to configure the username and password that will be used for authentication when communicating with the MQTT Broker. This screen also shows the "cluster URL" and "port" that you will need to connect to the broker.
Configuring MQTT Integration in Nussknacker
To create an integration with the MQTT broker, you need to navigate to the “integrations” tab in your Nussknacker Cloud account.
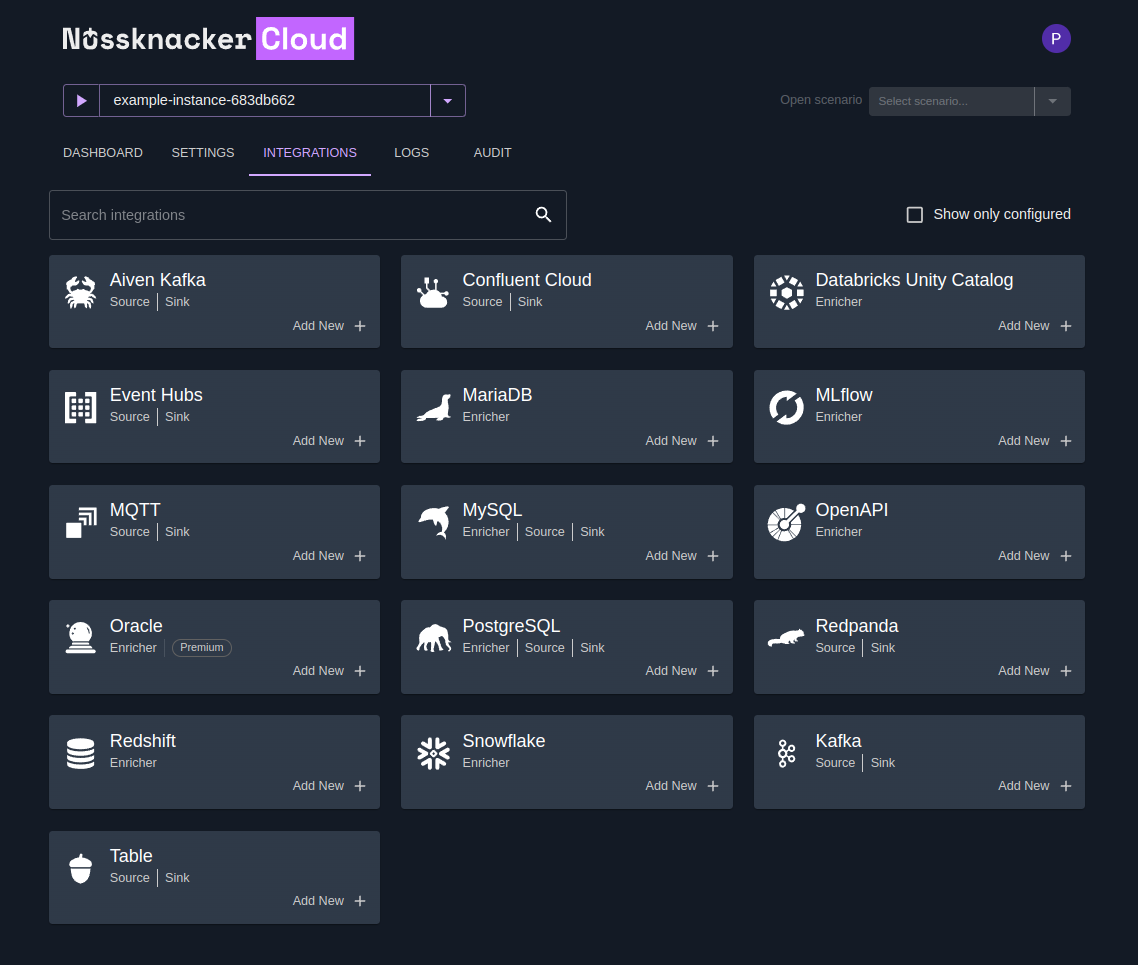
Click on the “add new” button in the “MQTT” section.

Here you can select the name of your integration (in the “Component name” field).
The actual configuration is represented by the "CREATE TABLE" statement. This may seem counterintuitive at first, so let’s examine why this is the case. In Nussknacker, each scenario uses a specific processing mode that you select when you create the scenario. In Nu Cloud, there are currently 3 processing modes: “Streaming”, “Request-Response” and “Batch”. We want to use MQTT integration in “Streaming” mode which uses Flink under the hood. Therefore, to integrate MQTT with Nussknacker, you integrate it with Flink. The integration between MQTT and Flink is done using a custom Flink table connector. Such connectors are configured using "CREATE TABLE" statements.
You are presented with the template of the “CREATE TABLE” statement, with all the important options that you can tweak.
- ‘connector’ = ‘mqtt’ tells Flink to use the MQTT connector; other configuration properties from the "with" block are passed to the MQTT connector.
- ‘hostname’ is the hostname of the MQTT broker; in our case, it's "cluster url".
- ‘port’ is the port of the MQTT broker
- ‘useTls’ should be true or false depending on whether the broker port is encrypted with TLS or not. Conventionally, if the port is '1883', it's not encrypted (so 'useTls' = false), and port '8883' indicates that it is encrypted.
- ‘username’ is the username to use for authentication
- ‘password’ is the password to use for authentication
- ‘topic’ is the MQTT topic to use. In the MQTT protocol, there is no need to declare a topic before using it
- ‘format’ = ‘json’ means that messages written to or read from the MQTT topic will be in JSON format.
- ‘connectTimeoutMs’ determines how much time the MQTT client waits for a response from the MQTT broker during a connection.
- ‘qos’ is the MQTT quality of service. It can have 3 possible values: 0 (meaning at most once), 1 (meaning at least once), and 2 (meaning exactly once).
In the case of our scenario and broker, you need the following "CREATE TABLE" statement.
CREATE TABLE MEASUREMENTS (
machine_id String,
winding_temperature DOUBLE,
ambient_temperature Double,
vibration_level Double,
current_draw Double,
voltage_level Double,
nominal_speed Double,
power_consumption Double,
efficiency Double,
ts STRING,
emissionTime TIMESTAMP(3),
WATERMARK FOR emissionTime AS emissionTime - INTERVAL '5' SECOND
) WITH (
'connector' = 'mqtt',
'hostname' = 'fd164a3795ee4f3d8bd182eebaaa58d2.s1.eu.hivemq.cloud',
'port' = '8883',
'topic' = 'nussknackerTopic',
'format' = 'json',
'connectTimeoutMs' = '10000',
'useTls' = 'true',
'qos' = '2',
'username' = '<username>',
'password' = '<password>'
);
Where 'username' and 'password' are the ones you chose when setting up the MQTT broker.
The “CREATE TABLE” statement defines the columns of the table. On the MQTT side, column names become fields in JSON messages sent to the MQTT topic. On the Nussknacker side, they become field names in the records read from the MQTT source or written to the MQTT sink. Nussknacker will also read type information from these columns to allow proper type checking of scenarios using this integration.
The "CREATE TABLE" statement also contains the line "WATERMARK FOR emissionTime AS emissionTime - INTERVAL '5' SECOND", which is a bit more complicated. This line is needed because we are going to use processing in time windows in the Nu scenario (time windows are used in a node named “Compute statistics in a 3-minute tumbling windows”). Since Nussknacker uses Flink in streaming processing mode with event time semantics, we need to assign an event time (timestamp) to each event coming from the MQTT source. The source also needs to send watermarks. This line does both of those things. See to learn more about the syntax of this line.
After clicking "Save changes", the MQTT source and sink will be available for use in Nussknacker scenarios.
Using Integration
If you have followed the steps up to this point, you have a working MQTT integration that behaves exactly like the one used in our demo scenario. Let's see how it's used there.
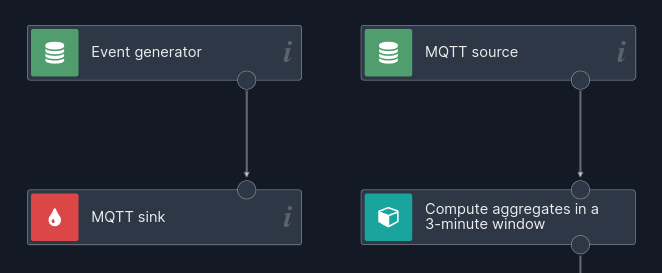
In this screenshot of the scenario, sample machine data is generated in the "event-generator" source node, which sends random data records every 3 seconds. This data is then sent to the sink node "MQTT Sink", which publishes it to the MQTT broker on some topic. The source node "MQTT Source" is subscribed to this topic, so it receives this data. Finally, the read data flows to the rest of the scenario where it is analyzed.
Simplified connectivity to IoT devices
We looked at how to integrate MQTT with Nussknacker. This integration introduces MQTT source and sink nodes that behave exactly like the source and sink nodes used in our example scenario. The scenario consumes MQTT messages generated by this scenario, but of course, it can also consume data generated by real IoT devices.